Dash Arduino C++ Library
2 Aug 2024
All Arduino C++ libraries include the core library files DashIO.h and DashIO.cpp. The Dash library is important for developing your projects for two main reasons:
- The header file provides all the information you will need to create your device, connections and controls (using methods and attributes).
- To enable you to create your own libraries for whatever project you can imagine.
The DashIO Arduino C++ library is available on GitHub.
DashDevice
DashDevice is the workhorse class, providing much of the functionality for messaging. It holds important attributes for the IoT device:
- deviceID : String - the unique identifier of the IoT device. A UUID may be used for the deviceID, or the mac address from the comms peripheral is also suitable.
- type : String - human readable text to describe the IoT device. This can be whatever you choose and may be a manufaturer product designator. Once this is assigned to the DashDevice it cannot be changed.
- name : String - human readable name for the IoT device. This can be changed by through the Dash protocol.
- mqttSubscrberTopic : String - the DashDevice also creates and stores the mqttSubscrberTopic for MQTT connections.
- configC64Str : String - pointer program memory containing the layout configuration text for the IoT device. The C64 string is compressed and encoded into Base64 for transmitting within text messages.
- cfgRevision : int - revision number of the layout configuration.
The DashDevice contains all the methods for creating the correctly formatted messages that are sent through the BLE, TCP and MQTT connections. This data includes messages for each control and their configuration messages. Please refer to the file DashIO.h for details.
You must create an instance of DashDevice class with one of the following:
DashDevice dashDevice(Device_Type);
DashioDevice dashDevice(Device_Type);
DashDevice dashDevice(Device_Type, &configC64Str, cfgRevision);
DashioDevice dashDevice(Device_Type), &configC64Str, cfgRevision;
Attributes
- Device_Type : String. A user defined String that describes the device and which is presented to the user during device discovery.
- configC64Str : String - pointer to the layout configuration text for the IoT device.
- cfgRevision : int - revision number of the layout configuration.
Methods
The following method must be called from within the Arduino setup() method:
dashDevice.setup(deviceID);
dashDevice.setup(deviceID, device_name);
dashDevice.setStatusCallback(&statusCallback);
Attributes
- deviceID : String. Unique identifier of the IoT device. The deviceID is typically set to the mac address from a comms peripheral and may be a String or an array of 6 bytes. The device_name is a String.
- device_name : String. Default name given to the IoT device, which can be changed by the Dash app.
- statusCallback(statusCode) Callback which is called for various connection status changes.
- statusCode : enumerator - Connection status for ESP microcontrollers only {noError, wifiConnected, wifiDisconnected, mqttConnected, mqttDisconnected}
DashDevice contains all the methods for creating messages that the IoT device can send through a connection. For example:
String message = dashDevice.getSelectorMessage("SELECTOR_ID", menuSelectorIndex, selection, 3);
message += dashDevice.getButtonMessage("BUTTON_ID", menuButtonValue);
message += dashDevice.getTextBoxMessage("TEXTBOX_ID", String(menuTextBoxValue));
message += dashDevice.getSliderMessage("SLIDER_ID", menuSliderValue);
Connections
The creation of connection objects differs very slightly depending on the specific hardware being used. Please refer to the software guides for specific hardware for examples.
DashWiFi
A DashWiFi object is required for both TCP and MQTT connections that are to be used over WiFi. The TCP and MQTT connections must be attached to the DashWiFi object so it can do all the heavy lifting. Create an instance of DashWiFi with either of the following:
DashWiFi   wifi;
DashioWiFi wifi;
Methods
wifi.setOnConnectCallback(&onWiFiConnectCallback); DEPRECATED
wifi.attachConnection(&connection);
wifi.begin(SSID, wifiPassword);
Attributes
- onWiFiConnectCallback(void). Callback which is called when the WiFi is successfully connected (see examples below) DEPRECATED, use dashDevice.setStatusCallback.
- connection. BLE, TCP or MQTT connection object as described below
- SSID : String. WiFi SSID
- wifiPassword : String. WiFi password
The final method must be called in the Arduino loop() method to allow the with WiFi and connections work.
wifi.run();DashLTE
A DashLTE object is required for an MQTT connection that is to be used with LTE on the Arduino MKR NB 1500. The MQTT connection must be attached to the DashLTE object so it can do all the heavy lifting. Create an instance of DashLTE with either of the following:
DashLTE   lte;
DashioLTE lte;
Methods
lte.setOnConnectCallback(&onLTEconnectCallback);
lte.attachConnection(&connection);
lte.begin(pin);
lte.begin(pin, apn);
lte.begin(pin, apn, username, password);
Attributes
- onLTEconnectCallback(void). Callback which is called when LTE is successfully connected
- connection. BLE, TCP or MQTT connection object as described below
- pin : String. SIM PIN number (4 digits in a string, example: "1234"). optional
- apn : String. APN to use. optional
- username : String. APN username. optional
- password : String. APN password. optional
The final method must be called in the Arduino loop() method to allow the with LTE and connection work.
lte.run();DashTCP
The DashTCP sets up a connection to the Dash app within a local area network and is created by one of the following
DashTCP   tcp_con(&dashDevice, printMessages, tcpPort);
DashioTCP tcp_con(&dashDevice, printMessages, tcpPort);

// ESP32 & ESP8266 only
DashTCP   tcp_con(&dashDevice, printMessages, tcpPort, numClients);
DashioTCP tcp_con(&dashDevice, printMessages, tcpPort, numClients);
Attributes
- dashDevice : DashDevice
- printMessages : bool, to print debug messages to the Serial port
- tcpPort : int, defaults to 5650
- numClients : uint8_t, the number of TCP connections that can simultaneously connect to the device (ESP32 & ESP8266 only), defaults to 1
Methods
tcp_con.setCallback(&processIncomingMessage);
tcp_con.sendMessage(message); // Send Dash message to Dash app or server
Attributes
- processIncomingMessage(MessageData). Callback which is called when a message arrives from the Dash app (see examples below)
- message : String. Formatted Dash message.
DashMQTT
The DashMQTT sets up a connection to the Dash app via the Dash mqtt server. The Dash server has support for:
- sending notifications
- data storage for TimeGraphs, EventLogs, and Maps.
- Sharing devices with other users.
A DashMQTT connection is created with one of the following:
// ESP32 & ESP8266
DashMQTT mqtt_con(&DashDevice, sendRebootAlarm, printMessages, mqttBufferSize);
DashioMQTT mqtt_con(&DashDevice, sendRebootAlarm, printMessages, mqttBufferSize);

// SAMD
DashMQTT mqtt_con(&DashDevice, sendRebootAlarm, printMessages);
DashioMQTT mqtt_con(&DashDevice, sendRebootAlarm, printMessages);
Attributes
- dashDevice : DashDevice
- sendRebootAlarm : bool. Enable an alarm message when the IoT device reboots
- printMessages : bool. Print debug messages to the Serial port
- mqttBufferSize : int. Maximum message size. Setting to 1024 or greater will allow sending of successive MQTT by the IoT device to be grouped together for faster communication.
Methods
mqtt_con.setCallback(&processIncomingMessage);
mqtt_con.addDashStore(controlType, controlID); // Request Dash server to store data
mqtt_con.sendMessage(message); // Send Dash message to Dash app or server
Parameters
- processIncomingMessage(MessageData). Callback which is called when a message arrives from the Dash app (see examples below)
- controlType : ControlType
- controlID : String
- message : String. Formatted Dash message.
DashBLE Connection
A BLE connection is instantiated with one of the following:
// ESP32 & ESP8266 & SAMD
DashBLE  ble_con(&dashDevice, printMessages);
DashioBLE  ble_con(&dashDevice, printMessages);

// Adafruit Bluefruit Friend
DashBluefruit_BLE ble_con(&dashDevice, printMessages);
DashioBluefruit_BLE ble_con(&dashDevice, printMessages);

// Bluno
DashBluno ble_con(&dashDevice);
DashioBluno ble_con(&dashDevice);
Attributes
- DashDevice : DashDevice
- printMessages : bool. Print debug messages to the Serial port
Methods
ble_con.setCallback(&processIncomingMessage);
ble_con.sendMessage(message); // Send Dash message to Dash app or server
Parameters
- processIncomingMessage(MessageData). Callback which is called when a message arrives from the Dash app (see examples below)
- message : String. Formatted Dash message.
Connection Examples
Here are some examples of instantiating connections for different processors. These examples use the folllowing methods:
- printMessages : bool: Print messages to the Serial Monitor
- tcpPort : int: TCP port of your choice, defaults to 5650
- sendRebootAlarm : bool: Send a push notification when the IoT device reboots.
- mqttBufferSize : int MQTT connection buffer size.
ESP32 & ESP8266 Example
DashioWiFi wifi;
DashioTCP  tcp_con(&DashDevice, printMessages, tcpPort);
DashioMQTT mqtt_con(&DashDevice, sendRebootAlarm, printMessages, mqttBufferSize);
DashioBLE  ble_con(&DashDevice, printMessages);
Arduino NANO 33 IoT & MKR 1010 Example
DashioWiFi wifi;
DashioTCP  tcp_con(&DashDevice, printMessages, tcpPort);
DashioMQTT mqtt_con(&DashDevice, sendRebootAlarm, printMessages);
DashioBLE  ble_con(&DashDevice, printMessages);
Arduino Nano 33 Example
DashioBLE ble_con(&DashDevice, printMessages);Arduino Bluefruit Example
DashioBluefruit_BLE ble_con(&DashDevice, printMessages);Arduino Bluno Example
DashioBluno ble_con(&DashDevice);Connection Setup and Receiving Messages
The following is an example of how to setup and start wifi and all connections, including the processIncomingMessage callback, which is used to process Receiving Messages:
void processIncomingMessage(MessageData *messageData) {
    switch (messageData->control) {
    case status:
      processStatus(messageData->connectionType);
      break;

    // etc.

    default:
      break;
    }
}

void setup() {
    // Setup DashDevice
    DashDevice.setup(wifi.macAddress()); // Get unique deviceID

    // Setup & start BLE connection
    ble_con.setCallback(&processIncomingMessage);
    ble_con.begin();

    // Setup MQTT connection
    mqtt_con.setup(mqttUser, mqttPassword);
    mqtt_con.setCallback(&processIncomingMessage);
    mqtt_con.addDashStore(timeGraph, TG_CONTROL_ID);
    wifi.attachConnection(&mqtt_con);

    // Setup TCP connection
    tcp_con.setCallback(&processIncomingMessage);
    wifi.attachConnection(&tcp_con);

    // Start WiFi, which will also start TCP and MQTT if attached
    wifi.begin(dashioProvision.wifiSSID, dashioProvision.wifiPassword);
}
A Soft AP connection is also available for ESP devices. Please review the header file "DashioESP.h" for details.
WiFi Connection Callback
You can also setup a callback that is executed when the WiFI is connected:
void onWiFiConnectCallback(void) {
    // Do something useful when the WiFi connects
}

void setup() {
    wifi.setOnConnectCallback(&onWiFiConnectCallback);

    // etc.
}
Running the Connections
To make sure the connections run and the callbacks are executed, the connections must be "run" from within the main loop.
void loop() {
    ble_con.run();
    wifi.run();
}
The wifi.run(); manages running TCP and MQTT connections.
Controls Messaging
As discussed above, incoming messages are received from the Dash app through the processIncomingMessage callback.
To send a message to the Dash dashboard, a formatted message must first be created and then sent through one or more connection.
Messageing Principles
Controls within an IoT device may send an receive messages from a Dash app at any time the IoT device is connected to the Dash app:
- Receiving a message allows the IoT device to take action according to the contents of the message received from the Dash app.
- Sending a message allows the IoT device to send information or provide feedback to the user of the Dash app.
- It is good practice to reply to a received control message. This is to provide feedback to the user of the Dash app that an action has taken place, or not.
MessageData Class
The MessageData class provides the message processing for incoming messages and stores the results. It is an attribute of each connection and is available as a attribute in the incoming message callback that you must setup for each connection (BLE, TCP or MQTT), as described in the Connections section. The connection incoming message callback must take the form:
void processIncomingMessage(MessageData *messageData) {
    switch (messageData->control) {
    case status:
      // TODO send update message from each control to the Dash IoT dashboard
      break;
    case button:
      // TODO process the incoming button message
      break;
    case slider:
      // TODO process the incoming slider message
      break;

      // etc
      // etc
      // etc

    default:
      break;
    }
}
The important attributes of the MessageData are:
- connectionType : enumerator - Set at instantiation of the class and use to define the type of connection: enum {BLECONN, TCPCONN, MQTT_CONN}. The MessageData must be instantiated with the connectionType as an attribute.
- control : enumerator - Contains the Control_Type of the received message: enum {deviceView, label, button, menu, buttonGroup, eventLog, slider, knob, dial, direction, textBox, selector, chart, timeGraph, mapper, colorPicker, audioVisual}.
- idStr : String - Contains the control_ID of the received message.
- payloadStr : String - Contains the primary payload field of the received message.
- payloadStr2 : String - Contains the secondary payload field of the received message.
Examples for each control are given in the Controls section.
Receiving Messages
Receiving Messages are received in the incoming message callback, which includes the MessageData as a parameter. The contents of the incoming message are contained within the MessageData class as described above.
Use the control (Control_Type) and idStr (ControlID) to address the control the MessageData is referring to. Then, use payloadStr and payloadStr2 to access the contents of the message.
For example, consider when a button message is received from the Dash app. The received message tells tha IoT device that the particular button, addressed by the control and idStr, has been tapped on the Dash app and the button boolean in the IoT device needs to be toggled. The payloadStr or payloadStr2 message components are not used in this case:<
void processIncomingMessage(MessageData *messageData) { // callback
    switch (messageData->control) {
    case button: // Process Button
        if (messageData->idStr == "BUTTON_ID") {
            buttonValue = !buttonValue;
        }
    default:
        break;
    }
}
where buttonValue is a boolean representing whether the button should be display as on (true) or off (false) on the Dash app.
A button control reply message may be created in the IoT device and returned to a connection (in this example both BLE or MQTT) as follows:
void processIncomingMessage(MessageData *messageData) { // callback
    switch (messageData->control) {
    case button: // Process Button
        if (messageData->idStr == "BUTTON_ID") {
            buttonValue = !buttonValue;
            String message = dashDevice.getButtonMessage("BUTTON_ID", buttonValue);
            if (messageData->connectionType == BLE_CONN) {
                ble_con.sendMessage(message);
            } else if (messageData->connectionType == MQTT_CONN) {
                mqtt_con.sendMessage(message);
            }
        }
    default:
        break;
    }
}
An instance of DashDevice is used to create the button message by using the function dashDevice.getButtonMessage("BUTTON_ID", buttonValue)
Receiving Status Request Messages
When a Dash app connects to an IoT device, the Dash app sends a STATUS request message to the IoT device. When the IoT device receives the STATUS message it can send the current status of it's controls variables to update the Dash app. For example, if a variable such as temperature is to be shown on a Dial on the Dash app, the IoT device should send a Dial message with the temperature value:
void processIncomingMessage(MessageData * messageData) {
    switch (messageData->control) {
    case status:
        String message = dashDevice.getDialMessage("D01", dialValue); // int or float
        sendMessage(messageData->connectionType, message);
        break;
    }
}
Sending Messages
Once messages are created, they are sent through connections and are typically, but not always, sent as a reply through the connection where an incoming message arrived. Below is an example of a method to send a message to a specific connection:
void sendMessage(ConnectionType connectionType, const String& message) {
    if (connectionType == TCP_CONN) {
        tcp_con.sendMessage(message);
    } else if (connectionType == BLE_CONN) {
        ble_con.sendMessage(message);
    } else {
        mqtt_con.sendMessage(message);
    }
}
Controls
In the following sub-sections, controlID is the control identifier and message is a String containing the contents of a message the may be sent to the Dash app through a connection (BLE, TCP or MQTT).
All time infomration is sent and received as an IOS 8601 format String representing the UTC time i.e. "yyyy-MM-dd’T’HH:mm:ssZ".
All color information is a String with the color name (as used in the Dash app, e.g. "blue", or a hex color, e.g. "#RRGGBB")
When the controlID is the only attribute of a control message, the control on the Dash app will not change its value, but will be "greyed out" to indicate that the displayed value may be out of date.
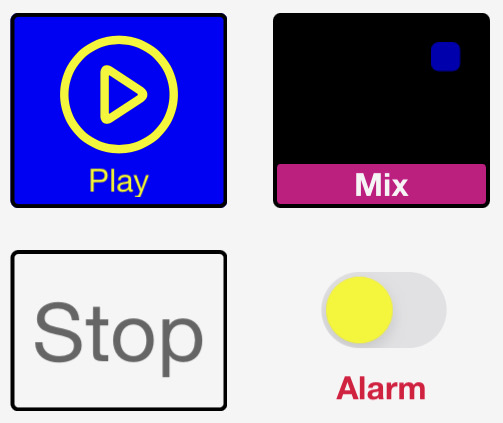
Button
A Button allow the user to send a simple action, informing the IoT device that the button has been pressed. The button state (on or off color) is not changed by tapping the button. After the IoT device receives a message containing the action, it sends a message back to the control in the dashboard to set the button state.
A Button control behaves as both as a momentary push button for user input and as a status indicator to provide feedback from the IoT device.
The control can change the button icon and text of the control on the Dash app.
Receiving Messages
An incoming Button control message indicates that the Button control on the Dash app has been tapped and the state on the Button control in the IoT device should be toggled.
MessageData Attributes
- payloadStr unused
- payloadStr2 unused
Sending Messages
Button Sending Messages can send the button state, which only changes the button's color on the Dash app, or it can also specify the icon and text to be displayed.
message = dashDevice.getButtonMessage(controlID);
message = dashDevice.getButtonMessage(controlID, on);
message = dashDevice.getButtonMessage(controlID, on, iconName);
message = dashDevice.getButtonMessage(controlID, on, iconName, text);
Attributes
- on: bool indicating if the button is on (true) or off
- iconName: String parameter containing the name of the icon to display on the button. If blank (""), the icon on the button is NOT changed.
- text: String parameter containing the text to display on the button. If blank, (""), the text on the button is NOT changed. If text is NOT blank, setting the iconName to blank will remove the icon from the button.
Example Code
Process incoming status request and respond to a button message by toggling the button state and replying:
bool btnState = false;

void processIncomingMessage(MessageData *messageData) {
    switch (messageData->control) {
    case status:
        String message = dashDevice.getButtonMessage("BT01", btnState);
        sendMessage(messageData->connectionType, message);
        break;
    case button:
        if (messageData->idStr == “BT01”) {
            btnState = !btnState;
            String message = dashDevice.getButtonMessage("BT01", btnState);
            sendMessage(messageData->connectionType, message);
        }
        Break;
    }
}
Send the button state, change the button icon to "stop" and change the button text to "OFF":
String message = dashDevice.getButtonMessage("BT01", btnState, "stop", "OFF);
sendMessage(messageData->connectionType, message);
Slider
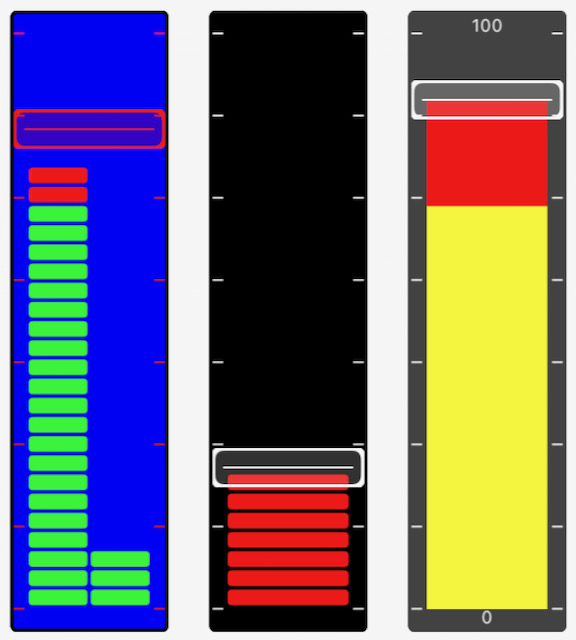
A Sliders allow the user to send a numerical values to the IoT device when the user drags the slider to a new position. The slider also includes a bar graph that can be set by the IoT device. The bar graphs can be controlled independently of the slider or can be used to provide feedback to the user from the IoT Device.
The IoT device may send messages to update both the bar graph and the slider knob positions. The bar graph may set to have two bars.
The knob of the slider may be disabled so that the slider becomes a simple bar graph indicator.
Receiving Messages
An incoming Slider control message indicates that the Slider control on the Dash app has been moved.
MessageData Attributes
- payloadStr Value of the new position of the slider.
- payloadStr2 unused
Sending Messages
message = dashDevice.getSliderMessage(controlID);
message = dashDevice.getSliderMessage(controlID, value);
message = dashDevice.getSingleBarMessage(controlID);
message = dashDevice.getSingleBarMessage(controlID, value);
message = dashDevice.getDoubleBarMessage(controlID);
message = dashDevice.getDoubleBarMessage(controlID, value1, value2);
The slider Sending Messages are of three different types:
- getSliderMessage: set the position of the knob on the slider (float or int).
- getSingleBarMessage: set the position of a singe bar under the slider (float or int).
- getDoubleBarMessage: set the position of two bars under the slider (float or int).
Attributes
- value, value1, value2: position of the knob or bar. The minimum and maximum values of the slider are specified in the slider's configuration data.
Example Code
Process incoming status request and respond to a slider message by updating the sliderValue:
float sliderValue = 60;

void processIncomingMessage(MessageData * messageData) {
    switch (messageData->control) {
    case status:
        String message = dashDevice.getSliderMessage("SL01", sliderValue);
        sendMessage(messageData->connectionType, message);
        break;
    case slider:
        if (messageData->idStr == "SL01") {
            sliderValue = messageData->payloadStr.toFloat();
        }
        break;
    }
}
Send the slider bar values (only required if the slider bar is not set to follow the slider knob):
float barValue1 = 40;
float barValue2 = 50;
String message = dashDevice.getDoubleBarMessage("SL01", barValue1, barValue2);
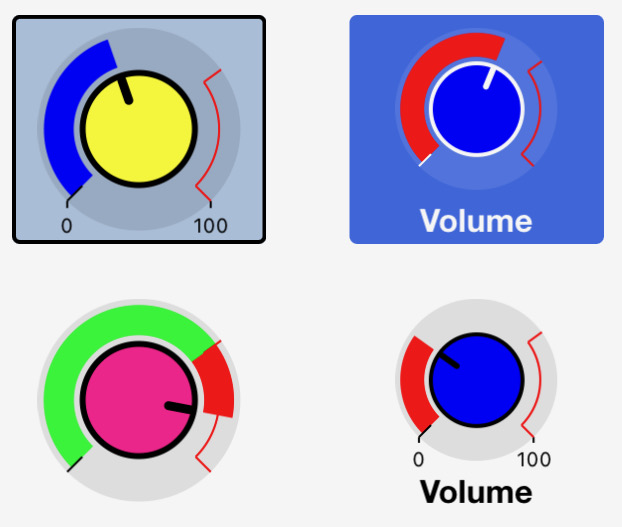
connection.sendMessage(message);Knob
A Knob allow the user to send numerical values to the IoT device when the user drags the knob to a new position. A Knob control contains a user adjustable knob surrounded by a simple dial indicator. The dial can be controlled independently of the knob or can be used to provide feedback to the user from the IoT Device.
The IoT device may send messages to update both the dial and knob positions.
Receiving Messages
An incoming Knob control message indicates that the Knob control on the Dash app has been rotated.
MessageData Attributes
- payloadStr New value of the Knob position.
- payloadStr2 unused
Sending Messages
message = dashDevice.getKnobMessage(controlID);
message = dashDevice.getKnobMessage(controlID, value);
message = dashDevice.getKnobDialMessage(controlID);
message = dashDevice.getKnobDialMessage(controlID, value);
The knob messages are of two different types:
- getKnobMessage: set the position of the knob (float or int).
- getKnobDialMessage: set the position of a dial surrounding the knob (float or int).
Attributes
- value: position of the knob or dial. The minimum and maximum values of the knob are specified in the knob's configuration data.
Example Code
Process incoming status request and respond to a knob message by updating the knobValue:
float knobValue = 30;

void processIncomingMessage(MessageData * messageData) {
    switch (messageData->control) {
    case status:
        String message = dashDevice.getKnobMessage("KB01", knobValue); // int or float
        sendMessage(messageData->connectionType, message);
        break;
    case knob:
        if (messageData->idStr == "KB01") {
            knobValue = messageData->payloadStr.toFloat()
        }
        break;
    }
}
Send the knob dial value (only required if the dial is not set to follow the knob):
float dialValue = 20;

String message = dashDevice.getKnobDialMessage("KB01", dialValue);
connection.sendMessage(message);
Dial
A Dial display is used to present a numerical value in a graphical circular dial. The Dial display receives messages from the IoT device to set the dial position.
Receiving Messages
There are no Receiving Messages for the Dial control.
Sending Messages
Dial control Sending Messages contain the position of the dial.
message = dashDevice.getDialMessage(controlID);
message = dashDevice.getDialMessage(controlID, value);
Attributes
- value: position of the dial (float or int). The minimum and maximum values of the dial are specified in the dial's configuration data.
Example Code
Process incoming status request:
float dialValue = 5;

void processIncomingMessage(MessageData * messageData) {
    switch (messageData->control) {
    case status:
        String message = dashDevice.getDialMessage("D01", dialValue); // int or float
        sendMessage(messageData->connectionType, message);
        break;
    }
}
Send the dial value:
String message = dashDevice.getDialMessage("D01", dialValue);
connection.sendMessage(message);
Direction
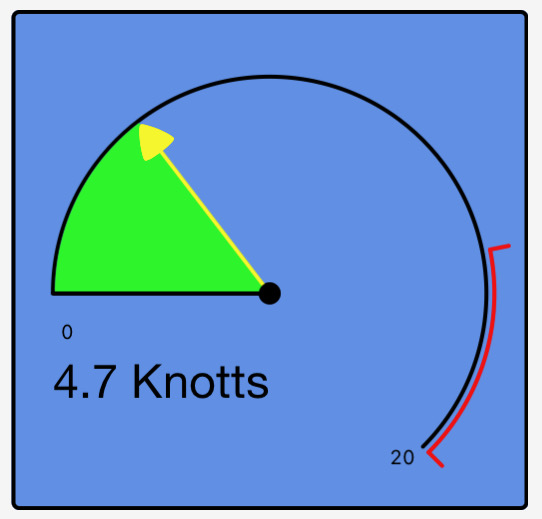
A Direction display is used to graphically present a decimal direction value from 0 to 360 degrees. The Direction display receives messages from the IoT device to set the direction indicator position.
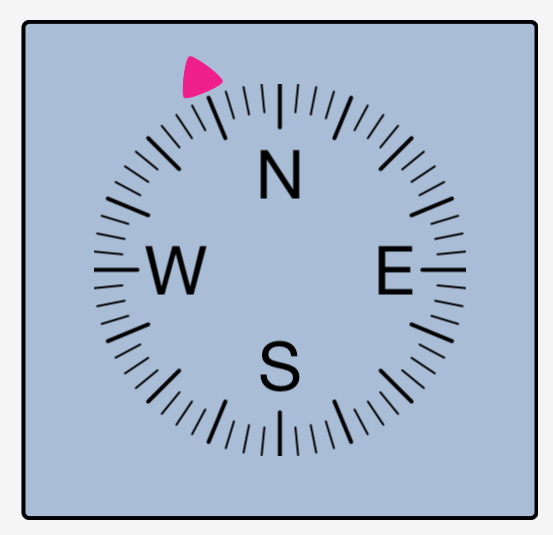
Receiving Messages
There are no Receiving Messages for the Direction control.
Sending Messages
Direction control Sending Messages contain the position of the direction indicator.
message = dashDevice.getDirectionMessage(controlID);
message = dashDevice.getDirectionMessage(controlID, direction);
message = dashDevice.getDirectionMessage(controlID, direction, speed);
Attributes
- direction: direction in decimal degrees (float or int).
- speed: speed where the units are specified in the direction control's configuration data (float).
Example Code
Process incoming status request:
int windDirectionIndex = 5;
float windSpeedKnotts = 32;

void processIncomingMessage(MessageData * messageData) {
    switch (messageData->control) {
    case status:
        String message = dashDevice.getDirectionMessage("WD01", windDirectionIndex, windSpeedKnotts);
        sendMessage(messageData->connectionType, message);
        break;
    }
}
Send the direction and speed values:
String message = dashDevice.getDirectionMessage("WD01", windDirectionIndex, windSpeedKnotts);
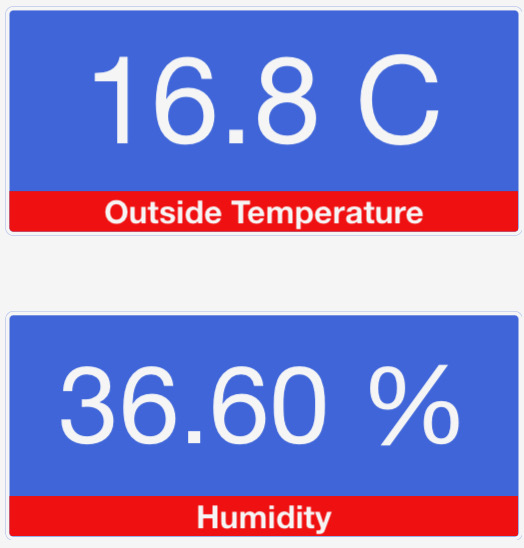
connection.sendMessage(message);Text Box
A Text Box control receives simple line text messages from the IoT device to display on the DashIO Dashboard. The text may optionally be plain text, reformatted as a number or, when the text is ISO8601 date/time, it may be formatted to a date/time that is easy to read.
The Text Box may also allow the user to input text. Touching the control will present the user with a keyboard where the user can enter text. When the Send button on the keyboard is pressed, the message will be sent to the IoT device.
Receiving Messages
An incoming Text Box control message contains a text string that can be used by the IoT device as text or converted to a number.
MessageData Attributes
- payloadStr Text string
- payloadStr2 unused
Sending Messages
Text Box control Sending Messages contain the text to display on the Text Box on the Dash app. Specific messages are also available to send to a caption field in the Text Box.
message = dashDevice.getTextBoxMessage(controlID, text);
message = dashDevice.getTextBoxMessage(controlID, text, color);
message = getTextBoxCaptionMessage(controlID, text);
message = getTextBoxCaptionMessage(controlID, text, color);
Attributes
- text: String to be displayed in the text box.
- color: String field defining the color of the text line. It is either the color name from colors in Dash app (e.g. “blue”) or a RGB hexadecimal string (e.g. “#23A89F”).
Example Code
Process incoming status request and respond to a text message by updating the textValue:
String textValue = "";

void processIncomingMessage(MessageData * messageData) {
    switch (messageData->control) {
    case status:
        String  message = dashDevice.getTextBoxMessage("TB01", String(menuTextBoxValue));
        sendMessage(messageData->connectionType, message);
        break;
    case textBox:
        if (messageData->idStr == "TB01") {
            textValue = messageData->payloadStr.toFloat();
        }
        break;
    }
}
Send the text value:
String message = dashDevice.getTextBoxMessage("TB01", textValue);
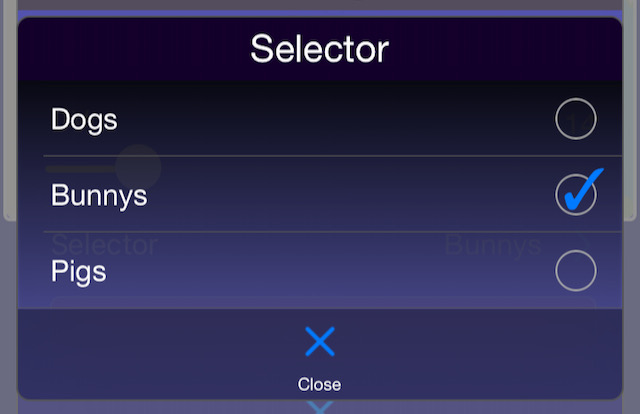
connection.sendMessage(message);Selector
A Selector control is used to present a popup list of options that the user can select from. When a Selector is tapped, the DashIO Dashboard presents the list of text options to the user to make their selection from. The user can tap on an option to select and the index of the selected option will be sent to the IoT device.
Feedback to the user of the dashboard is achieved when the IoT device responds to the selection message. The dashboard updates the Selector control check box with this value.
Receiving Messages
An incoming Selector control message indicates that the Selector control on the Dash app has had a selection made.
MessageData Attributes
- payloadStr Index of the new selection.
- payloadStr2 unused
Sending Messages
Text Selector control Sending Messages contain the current selection index, and optionally, the selection items.
message = dashDevice.getSelectorMessage(controlID);
message = dashDevice.getSelectorMessage(controlID, index);
message = dashDevice.getSelectorMessage(controlID, index, selectionItems, numItems)
Attributes
- index: index to the currently selected item.
- selectionItems: array of String where eack element in the arrray is a selection item.
- numItems: number of selection items.
Example Code
Process incoming status request and respond to a selector message by updating the selectorIndex:
int selectorIndex = 1;

void processIncomingMessage(MessageData * messageData) {
    switch (messageData->control) {
    case status:
        String selection[] = {F("Dogs"), F("Bunnys"), F("Cats")};
        String message = dashDevice.getSelectorMessage("SR01", selectorIndex, selection, 3);
        sendMessage(messageData->connectionType, message);
        break;
    case selector:
        if (messageData->idStr == "SR01") {
            selectorIndex = messageData->payloadStr.toInt();
        }
        break;
    }
}
Menu
A Menu control is used to present a popup table of user adjustable controls and is ideal for presenting a list of IoT device setup parameters. The Menu does not receive messages directly, but presents a list of other controls (sub-controls) that send and receive messages of their own.
Controls that can be included in a Menu control are Text Boxes, Sliders, Selectors and Buttons.
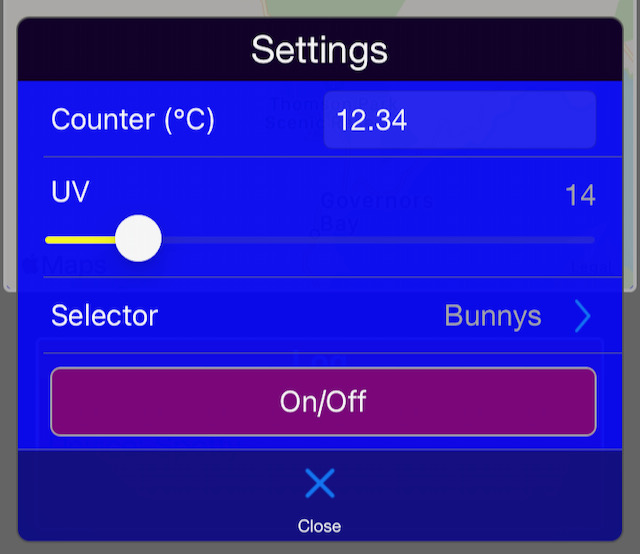
Receiving Messages
An incoming Menu control message indicates that the Menu control on the Dash app has been tapped.
MessageData Attributes
- payloadStr unused
- payloadStr2 unused
Other Receiving Messages are handled by the Menu's sub-controls.
Sending Messages
There are no Sending Messages available for the Menu control. All Sending Messages are handled by the Menu's sub-controls.
Button Group
A ButtonGroup control is used to present a popup grid or table of Button controls. The Button Group does not receive or send messages directly, but presents Button controls that send and receive messages.
Receiving Messages
An incoming Button Group control message indicates that the Button Group control on the Dash app has been tapped.
MessageData Attributes
- payloadStr unused
- payloadStr2 unused
Other Receiving Messages are handled by the Button Group's sub-controls.
Sending Messages
There are no Sending Messages available for the Button Group control. All Sending Messages are handled by the Button Group's sub-controls.
Chart
A Chart display is used to present graphical data on the DashIO Dashboard, where the data is a series of vertical (Y) axis data. The data is evenly spaced on the horizontal (X) axis. The IoT device sends a message for each line in the Chart. The data may be shown as lines, bars or peak values.
Each line can be independently added, deleted or changed by the IoT device. Multiple IoT devices can add lines to a single Chart control.
Receiving Messages
There are no Receiving Messages for the Chart control.
Sending Messages
Chart control Sending Messages contain the information for a single line to display on the Chart on the Dash app.
dashDevice.addChartLineInts(message, controlID, lineID, lineName, lineType, color, yAxisSelect, lineData, dataLength);
dashDevice.addChartLineFloats(message, controlID, lineID, lineName, lineType, color, yAxisSelect, lineData, dataLength);
The following methods have been deprecated:
message = dashDevice.getChartLineInts(controlID, lineID, lineName, lineType, color, yAxisSelect, lineData, dataLength);
message = dashDevice.getChartLineFloats(controlID, lineID, lineName, lineType, color, yAxisSelect, lineData, dataLength);
Attributes
- message: String to which the Chart message will be appended.
- lineID: String identifier of the chart line.
- lineName: Name of the chart line
- lineType: Enumerator for the style or type of line (see LineType below).
- color: color of the line.
- yAxisSelect: Enumerator to choose letf or right side Y axis (see YAxisSelect below).
- lineData: array or int or float.
- dataLength: number of elements in the lineData array.
enum LineType {
    line,    // Line betwen each point
    bar,     // Bar chart
    segBar,  // Bar chart with segmented bars (not available in Time Graphs)
    peakBar, // Bar chart with a howizontal line at the top or peak.  (not available in Time Graphs) instead of a filles or segmented bar. (not available in Time Graphs)
    bln,     // Shades an area of the graph (only available in TimeGraphs)
};

enum YAxisSelect {
    yLeft,   // line is scaled to the left side Y axis
    yRight.  // line is scaled to the right side Y axis
};
Example Code
Send chart data for 3 lines;
int data1[] = {150, 270, 390, 410, 400};
String message = dashDevice.getChartLineInts("G01", "L1", "Line One", line, "3", "left", data1, sizeof(data1)/sizeof(int));
int data2[] = {160, 280, 400, 410, 420};
message += dashDevice.getChartLineInts("G01", "L2", "Line Two", line, "4", "left", data2, sizeof(data2)/sizeof(int));
int data3[] = {170, 290, 410, 400, 390};
message += dashDevice.getChartLineInts("G01", "L3", "Line Three", line, "5", "right", data3, sizeof(data3)/sizeof(int));
line, "8", data5, sizeof(data5)/sizeof(int));
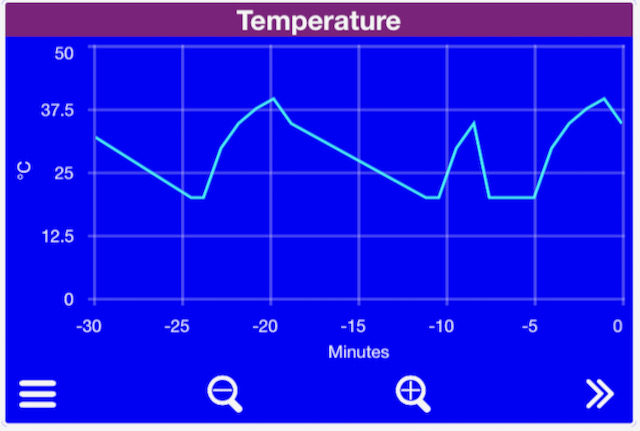
connection.sendMessage(message);Time Graph
A Time Graph display is used to present time-series graphical data on the DashIO Dashboard, where the data is a series of points containing the time on the horizontal axis and other data on the vertical axis. The IoT device sends messages for each line in the graph. Each message contains one or more data points and the DashIO Dashboard appends the incoming data to create a data series that can be presented, panned and zoomed by the user. The data may be shown as lines, bars or blocked areas.
Each line can be independently added, deleted or changed by the IoT device. Multiple IoT devices can add lines to a single Time Graph control.
Graph data is stored in the Dash app and optionally on the Dash server.
The dash server may be setup to continously record TimeGraph messages and the Dash app will update its TimeGraph from the dash server each time the app is run by the user.
Receiving Messages
There are no Receiving Messages for the TimeGraph control, except when the IoT device is capable of storing data (see below).
Sending Messages
Time Graph control outgoing line messages contain the information for a single line to display on the Time Graph on the Dash app.
TimeGraph line messages may contain all the metadata (name, color etc.) and line data, or just the metadata. TimeGraph point messages are a short format messages for just sending a single point on the graph line.
message = dashDevice.getTimeGraphLine(controlID, graphLineID, lineName, lineType, color, yAxisSelect);
message = dashDevice.getTimeGraphPoint(controlID, graphLineID, value);
message = dashDevice.getTimeGraphPoint(controlID, graphLineID, time, value);
Attributes
- graphLineID: String identifier of the graph line.
- lineName: Name of the graph line
- lineType: Enumerator for the style or type of line (see LineType in Chart control above).
- color: color of the line.
- yAxisSelect: Enumerator to choose letf or right side Y axis (see YAxisSelect in Chart control above).
- time: Time of the graph line point. If the time is not used, the current time will be inserted by either the dash server or Dash app when the message is received. optional
- value: float value of a single point.
Example Code
Process incoming status request by sending the line names, colors, and Y axis selector for lines "l1" and "l2". This is a critical step to make sure the Dash apps and server obtain the line setup information:
void processIncomingMessage(MessageData * messageData) {
    switch (messageData->control) {
    case status:
        String message = dashDevice.getTimeGraphLine("TG01", "l1", "Roger", line, "purple", "left");
        message += dashDevice.getTimeGraphLine("TG01", "l2", "Betty", line, "white", "right");
        sendMessage(messageData->connectionType, message);
        break;
    }
}
Send a Time Graph data point to the Dash app. The dash server will also store this data point. The receiver of the message will assign a time-stamp to the data point:
float num = 44;
String message = dashDevice.getTimeGraphPoint("TG01", "l1", num);
connection.sendMessage(message);
Send a Time Graph data point with time-stamp to the Dash app. The dash server will also store this data point. This example uses the TimeLib library: https://github.com/PaulStoffregen/Time. The time could be obtained from external sources such as a Real Time Clock, internet NTP time service or GPS time data:
#include <TimeLib.h>

static String timeToString(long time) {
  char buffer[22];
  sprintf(buffer, "%04d-%02d-%02dT%02d:%02d:%02dZ", year(time), month(time), day(time), hour(time), minute(time), second(time)); // Z = UTC time
  String dateTime(buffer);
  return dateTime;
}

float num = 33;
long time = 1666957371; // time as seconds since Jan 1 1970
String localTimeStr = timeToString(time);

String message = dashDevice.getTimeGraphPoint("TG01", "l1", localTimeStr, num);
connection.sendMessage(message);
TimeGraph Data Storage
The Dash messaging protocol allows for sending many TimeGraph line time-stamped data points in a single message, which is useful if the IoT device stores line data. However, this is beyond the scope of most applications.
Receiving Messages
An incoming Time Graph control request message indicates that the Dash app requires an update of the line data for the Time Graph. However, unless the IoT device is storing TimeGraph data, this incoming message can be ignored. The incoming request message contains a time-stamp that the Dash app requires line data timstamped from after this time.
MessageData Attributes
- payloadStr UTC time String from which the Time Graph on the Dash app requires line data.
- payloadStr2 unused
Sending Messages
Attributes
dashDevice.addTimeGraphLineFloats(message, controlID, graphLineID, lineName, lineType, color, yAxisSelect, times, lineData, dataLength);
dashDevice.addTimeGraphLineFloats(message, controlID, graphLineID, lineName, lineType, color, yAxisSelect, times, lineData, dataLength, breakLine);
dashDevice.addTimeGraphLineBools(message, controlID, graphLineID, lineName, lineType, color, times, lineData, dataLength);
The following methods have been deprecated:
message = dashDevice.getTimeGraphLineFloats(controlID, graphLineID, lineName, lineType, color, yAxisSelect, times, lineData, dataLength);
message = dashDevice.getTimeGraphLineFloats(controlID, graphLineID, lineName, lineType, color, yAxisSelect, times, lineData, dataLength, breakLine);
message = dashDevice.getTimeGraphLineBools(controlID, graphLineID, lineName, lineType, color, times, lineData, dataLength);- message: String to which the TimeGraph message will be appended.
- times array of time Strings.
- lineData: array of float or bool where each element matches the correcponding time in the times parameter.
- breakLine: Optional. When true, creates a break in the line data to seperate widely dispersed points.
- dataLength: number of elements in the lineData array.
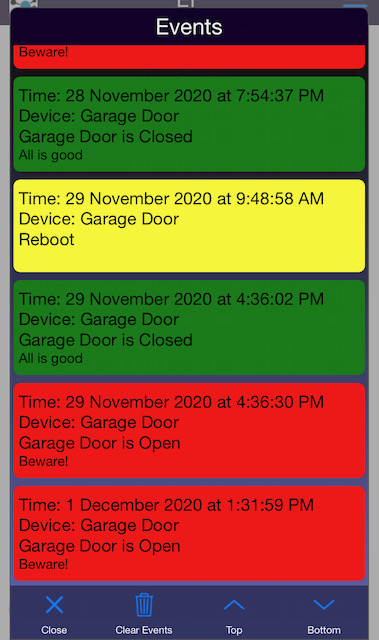
Event Log
An Event Log display is used to present time stamped events or alarms from IoT devices. The most recent event is shown on the control and a scrollable list of events is presented when the Event Log is tapped by the user.
Each event contains the time of the event, the color to display the event and the text to display.
Events are stored in the Dash app and optionally on the Dash server.
The dash server may be setup to continously record Event messages and the Dash app will update its EventLog from the dash server each time the app is run by the user.
Multiple IoT devices can be shown on a single Event Log control.
Receiving Messages
There are no Receiving Messages for the Event Log
Sending Messages
EventLog Sending Messages contain event data.
dashDevice.addEventLogMessage(message, controlID, color, textArr, numTextRows);
dashDevice.addEventLogMessage(message controlID, timeStr, color, textArr, numTextRows);
dashDevice.addEventLogMessage(message, controlID, eventsArr, numEvents);
The following methods have been deprecated:
message = dashDevice.getEventLogMessage(controlID, color, textArr, numTextRows);
message = dashDevice.getEventLogMessage(controlID, timeStr, color, textArr, numTextRows);
message = dashDevice.getEventLogMessage(controlID, eventsArr, numEvents);
Attributes
- message: String to which the EventLog message will be appended.
- timeStr: Event time. If the timeStr is left blank (""), the current time will be inserted by either the dash server or Dash app when the message is received. However, it is recommended to enter a valid UTC date/time string here wherever possible.
- color: color of the event.
- textArr: array of row of text to display on the event.
- numTextRows: number of elements in the textArr.
- eventsArr: array of Event struct (see below).
- numEvents: umber of elements in the eventsArr
struct Event {
    String timeStr; // Event time (UTC)
    String color;   // Color of the event.
    String *lines;  // Lines of text
    int numLines;   // Number of lines of text
};
Example Code
Send an event to the Dash app. The Dash server will also store this event. The receiver of the message will assign a time-stamp to the event:
String message = dashDevice.getEventLogMessage("LG01", "blue", lines, 2);Send an event with time-stamp to the Dash app. The dash server will also store this event. This example uses the TimeLib library: https://github.com/PaulStoffregen/Time. The time could be obtained from external sources such as a Real Time Clock, internet NTP time service or GPS time data:
#include <TimeLib.h>

static String timeToString(long time) {
  char buffer[22];
  sprintf(buffer, "%04d-%02d-%02dT%02d:%02d:%02dZ", year(time), month(time), day(time), hour(time), minute(time), second(time)); // Z = UTC time
  String dateTime(buffer);
  return dateTime;
}

float num = 33;
long time = 1666957371; // time as seconds since Jan 1 1970
String eventTimeStr = timeToString(time);

String message = dashDevice.getEventLogMessage("LG01", eventTimeStr, "blue", lines, 2);
connection.sendMessage(message);
Send an array of time-stamped events. In this case, the array contains only one event:
Event event;
event.time = eventTimeStr;
event.color = "green";
event.lines = lines;
event.numLines = 2;
Event events[1];
events[0] = event;
String message = dashDevice.getEventLogMessage("LG01", events, 1);
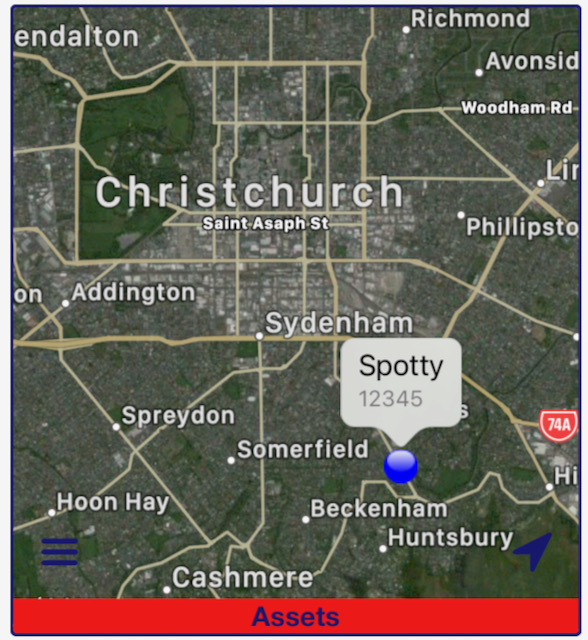
connection.sendMessage(message);Map
A Map display is used to plot positions on a map. The Map display receives messages from the IoT Device that contain latitude and longitude to mark the position. Additional data, such as speed and altitude may also be included and shown on the Map display.
Multiple IoT devices can be shown on a single Map.
Map track data is stored in the Dash app and optionally on the Dash server.
The dash server may be setup to continously record Map track messages and the Dash app will update its Map from the dash server each time the app is run by the user.
Receiving Messages
There are no Receiving Messages for the Map control, except when the IoT device is capable of storing data (see below).
Sending Messages
Map control Sending Messages contain the information for a single asset or track to display on the Map on the Dash app.
Map Sending Messages provide GPS data to the map control. The message can be either a single waypoint or many waypoints that form part of a track.
message = dashDevice.getMapWaypointMessage(controlID, trackID, latitude, longitude);
message = dashDevice.getMapTrackMessage(controlID, trackID, text, colour);
Attributes
- trackID: String identifier of the map track.
- latitude: Latitude decimal degrees as a String.
- longitude: Longitude decimal as a String.
- text: Test that is displayed on the asset pin.
- color: Colour of the track and asset pin.
struct Waypoint {
    String time;        // Time of the waypoint
    String latitude;    // Latitude in decimal degrees
    String longitude;   // Longitude in decimal degrees
    String avgeSpeed;   // Average speed since the last message in meters/second
    String peakSpeed;   // Maximum speed since the last message in meters/second
    String course;      // Course direction in decimal degrees. A negative value indicates an unknown heading
    String altitude;    // Altitude in meters
    String distance;    // Accumulated distance since the last message in meters
};
Example Code
Process incoming status request by sending the map track name and colors. This is a critical step to make sure the Dash apps and server obtain the map track setup information:
void processIncomingMessage(MessageData * messageData) {
    switch (messageData->control) {
    case status:
        String message = dashDevice.getMapTrackMessage("MP01", "T3", "StatusX", "blue");
        sendMessage(messageData->connectionType, message);
        break;
    }
}
Send a Map waypoint lat/lon message:
float lat = -43.559880 + (float)r / 10000;
char latBuffer[16];
sprintf(latBuffer, "%f", lat);
float lon = 172.655620 + (float)random(-49, 50) / 10000;
char lonBuffer[16];
sprintf(lonBuffer, "%f", lon);
String message = dashDevice.getMapWaypointMessage(MAP_ID, "T3", latBuffer, lonBuffer);
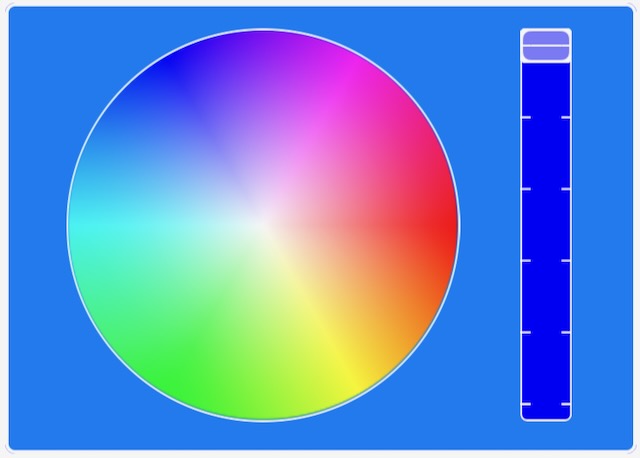
connection.sendMessage(message);Color Picker
A ColorPicker control is used to select a colour to send to the IoT device. The Colour Picker may be shown as either a spectrum or as a colour wheel and brightness slider.
Receiving Messages
An incoming Color Picker control message indicates that a new color has been chosen from the Color Picker control on the Dash app.
MessageData Attributes
- payloadStr New color String.
- payloadStr2 unused
Sending Messages
message = dashDevice.getColorMessage(controlID, color);Attributes
- color: Current colour of the colorPicker control.
Example Code
Process incoming status request and respond to a color message by updating the colorStr:
String colorStr = "";

void processIncomingMessage(MessageData * messageData) {
    switch (messageData->control) {
    case status:
        String message = dashDevice.getColorMessage("CP01", "#0080FF");
        sendMessage(messageData->connectionType, message);
        break;
    case color:
        colorStr = messageData->payloadStr;
        break;
    }
}
Audio Visual
An Audio Visual display allows the IoT Device to send a URL to the Dash app to play or display the contents of the URL. The URL may be a video or audio stream or an image.

Receiving Messages
There are no Receiving Messages for the Audio Visual control.
Sending Messages
message = dashDevice.getAudioVisualMessage(controlID, url);Attributes
- url: Set the URL of the audioVisual control.
Example Code
Process incoming status request:
void processIncomingMessage(MessageData * messageData) {
    switch (messageData->control) {
    case status:
        String message = dashDevice.getAudioVisualMessage(AV_ID, F("http://192.168.68.170/mjpeg/1"));
        sendMessage(messageData->connectionType, message);
        break;
    }
}
Label
A Label is a simple control to add structure to your layout on the dashboard. Labels do not transfer information with IoT devices.

The Label control does not receive or send messages.
Alarms
Alarm messages may be sent to the dash server, which in turn sends push notifications to your mobile devices.
Receiving Messages
There are no Receiving Messages for the Audio Visual control.
Sending Messages
String getAlarmMessage(const String& alarmID, const String& title, const String& description);
String getAlarmMessage(Notification alarm);
Attributes
- title: title of the alarm message
- description: description of the alarm
- alarm: structured details of an alarm (see below)
struct Notification {
    String identifier;    // Identifier of the notification.
    String title;         // Displayed in the notification title.
    String description;   // Displayed in the notification body.
};
Example Code
Send an alarm message to the dash server. This can only be done on an MQTT connection:
String message = dashDevice.getAlarmMessage("AL03", "An Alarm", "This is a test alarm");
mqtt_con.sendAlarmMessage(message);
Concatenating Status Request Messages
Messages can be concatenated and sens as a single message. This is particularly usef for sending all the Status request messages. The followinf example shows how to create a function for responding to the Srtatus request message for all controls. A message variable is created and sufficient memory is allocated for the concatentated messages and the message for each control is added. Don't concatenate too many messages that you exceed you reserved memory for the message as you can always sent them in smaller groups:
void processStatus(ConnectionType connectionType) {
    String message((char *)0);
    message.reserve(1024);

    // First group
    message = dashDevice.getButtonMessage("BT01", btnState);
    String selection[] = {F("Dogs"), F("Bunnys"), F("Cats")};
    message += dashDevice.getSelectorMessage("SR01", selectorIndex, selection, 3);
    message += dashDevice.getKnobMessage("KB01", knobValue);
    message += dashDevice.getTextBoxMessage("TB01", String(menuTextBoxValue));
    sendMessage(connectionType, message);

    // Second group
    message = dashDevice.getColorMessage("CP01", "#0080FF");
    message += dashDevice.getAudioVisualMessage(AV_ID, F("http://192.168.68.170/mjpeg/1"));
    message += dashDevice.getMapTrackMessage("MP01", "T3", "StatusX", "blue");
    sendMessage(connectionType, message);
}

void processIncomingMessage(MessageData *messageData) {
    switch (messageData->control) {
    case status:
        processStatus(messageData->connectionType);
        break;
    case button:
      // TODO process the incoming button message
      break;
    case slider:
      // TODO process the incoming slider message
      break;

      // etc
      // etc
      // etc

    default:
        break;
    }
}
Sending Messages in the Loop
It is good practice to only send messages from the loop() when the processor has time to do so. An messages should never be sent within an interrupt. A good way to manage sending messages is to create a global variable, e.g. String messageToSend that can be set with a message anywhere in the code and is sent in the loop(). The example below shows how to setup and reserve memory for the messageToSend:
String messageToSend = ((char *)0);

void setup() {
    messageToSend.reserve(200);
}

loop() {
    ble_con.run();
    wifi.run();

    if (messageToSend.length() > 0) {
        ble_con.sendMessage(messageToSend);
        tcp_con.sendMessage(messageToSend);
        mqtt_con.sendMessage(messageToSend);
        messageToSend = "";
    }
}
You simply assign messageToSend with one or more messages and let the loop() send it when it's ready:
messageToSend = dashDevice.getTimeGraphPoint(TGRAPH_ID, "l1", eventTimeStr, num);